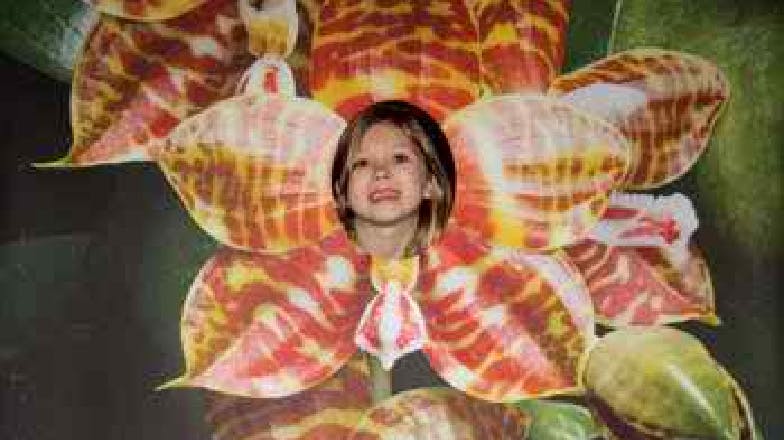
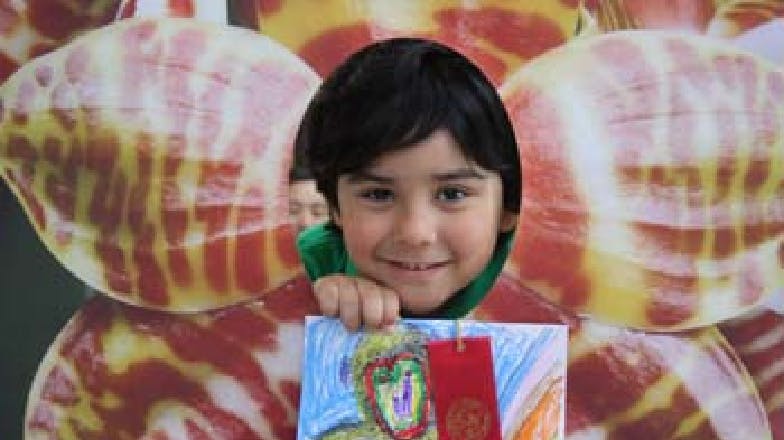
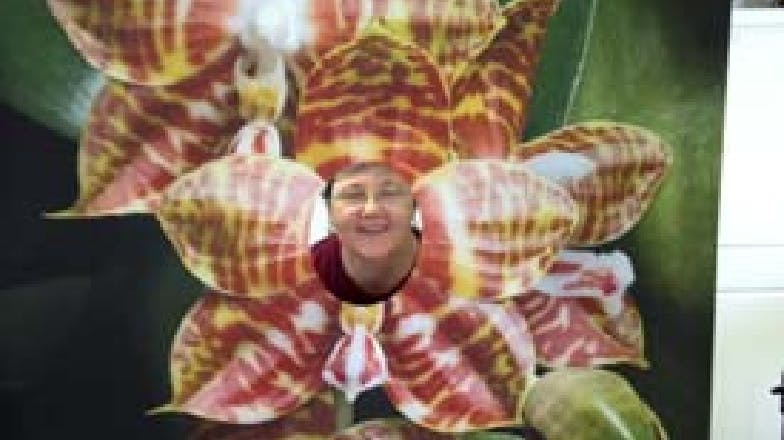
Kids' Photo Wall

by Sandy Stubbings and Susan Dally, AOS Education Committee.

Photo Wall

The Houston Orchid Society created a “Photo Panel” to stand at the corner of our orchid show and catch people’s attention. The Kid’s Corner consisted of a table of activities and a hanging vinyl photo (4’ x 6’) of an orchid. The vinyl poster hung from a photographers frame and had the center cut out of one of the flowers for children’s (or adult’s) faces. Parents or friends took photos of their children’s/friends faces in the flowers. This month I will include detailed instructions so your club can create this very successful activity.

How to make your own Photo Wall. Requirements: Supervision, a photograph, a stepstool and a standing frame.

Preparation

  • Select a photo with good resolution at least a 16mp digital photo (about 68 dpi or more.) Portrait orientation works best. It allows adults behind without having to crouch too low and hides the body of the person. The flower in the photo must face the camera directly. The flower must be full enough so that it completely surrounds the oval cut out (with no background showing on the oval.) When printed the flower needs to be big enough so that the face sized cut out only takes out the very center. Most of the flower should still be visible.
  • Have it blown up to 4” x 6” and printed on vinyl. (It can then be rolled for storage and travel.) A pocket across the top and the bottom will allow for hanging from a frame and weighting the base. We used a “photographers’ frame” that a club member no longer needed for his exhibit backdrops. If necessary, a frame can be constructed economically using PVC pipes.
  • Cut the oval hole using a craft knife from the center of the flower big enough for a face to fit in (approximately 5 X 7 inches.) ideally it should be in the top half of the photo.
  • A sign asking “Please Do Not Touch the Photo” is a big help as kids will try to grab onto the sides of the hole.
  • We also supplied a step stool so young children could reach the face opening. The stepstool should have handles children can grab onto for safety. (Not foreseeing this, we placed a sturdy chair on either side of the stepstool which seemed adequate.)
  • Place the “Photo Wall” near a staffed table and have the volunteers watch to see that the “Wall” is treated gently. (Your club table or AOS table staff may be able to double as supervisors.)

Cost

  • 4 X 6 foot vinyl banner with top and bottom pockets: $191.52 (purchased March 2012)
  • Oval Photo Matte Cutter - $39.95 See: www.altosezmat.com. Note that photo mat cutters cut at a 30 degree angle so it is best to make the cut from the back side to avoid having a white vinyl ring showing. This is easily done by pinning the template in the proper position on the front of the photo, then moving it to the back, attaching through the same pin holes.

This “Wall” was in constant use and brought many children to the activity table. We think as many adults as children used the “Photo Wall” You can make your own. (Ours is available to your club if someone from the Houston Orchid Society is going to be at your show. Contact Sandy Stubbings)

There are other societies that have included activities for children in their shows and I am hoping you will share those activities with us. You can contact me at sstubbings@comcast.net with your ideas and I will include them in a future article.

Hero-img3